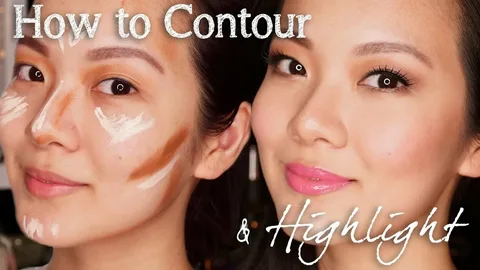
Contouring face has become an essential makeup technique for anyone looking to enhance their facial features, slim down certain areas, and achieve a more sculpted, define look.
Whether you’re a seasoned makeup artist or a beginner just starting to experiment with contouring, mastering this skill can truly transform your appearance.
In this comprehensive guide, we’ll dive deep into the art of face contouring, covering everything from the basics to advanced techniques.
You’ll learn how to customize your contouring routine based on your unique face shape, discover the best products and tools for a flawless application, and pick up genius tips to troubleshoot common contouring challenges.
By the end of this post, you’ll be on your way to creating professional level contoured looks that will have people asking, “How did you do that?”
Contouring 101: The Basics
What is Face Contouring?
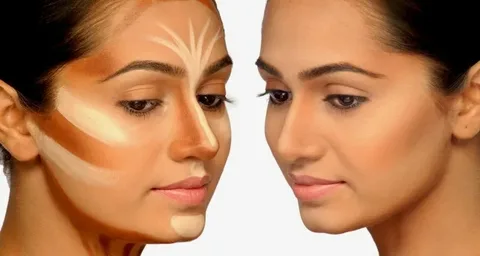
Face contouring is the strategic application of light and dark shades of makeup to create the illusion of depth and dimension on the face.
By strategically placing highlights and shadows, you can enhance your natural features, slim down certain areas, and achieve a more sculpted, defined appearance.
The key to effective contouring lies in understanding the fundamentals, including the proper placement of highlight and contour shades, as well as the techniques for seamless blending. Let’s dive in!
Essential Contouring Tools
Before you can start contouring like a pro, you’ll need to have the right tools in your makeup arsenal. Here are some of the essential items you’ll want to have on hand:
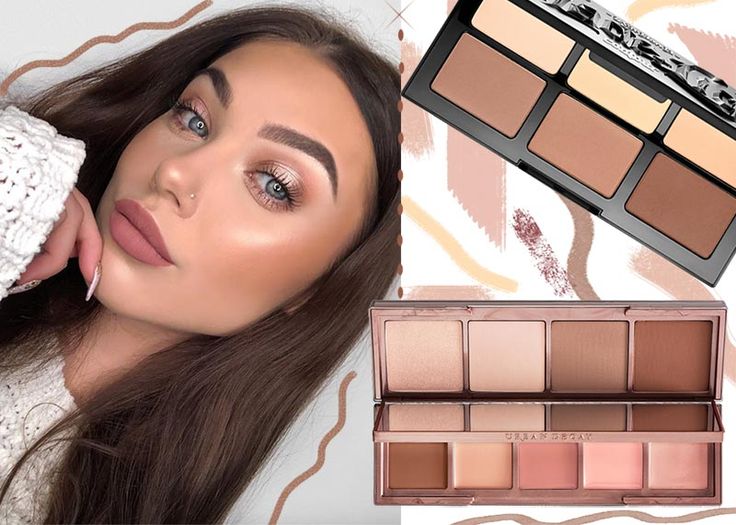
- Contour Powders or Creams: Look for matte, cool toned shades that are one to two shades darker than your natural skin tone.
- Highlighter Powders or Creams: Opt for luminous, light reflecting formulas that are one to two shades lighter than your skin.
- Makeup Brushes: A range of brushes, including a contour brush, a highlighting brush, and a fluffy blending brush, will make application easier.
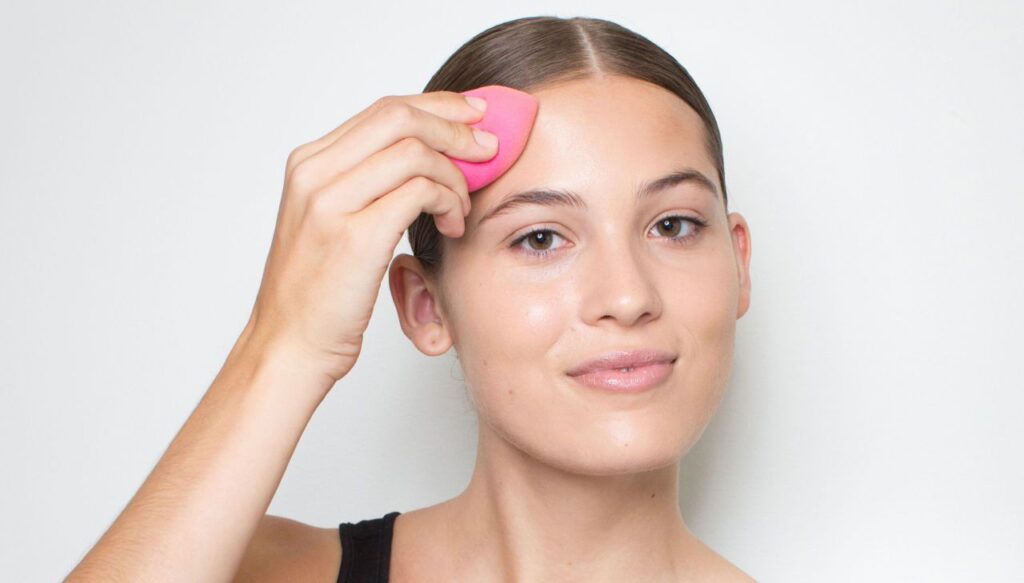
- Makeup Sponges: A damp beauty sponge can help seamlessly blend out contour and highlight for a natural, airbrushed finish.
Determining Your Face Shape
Before you start contouring, it’s important to understand your unique face shape, as this will guide the placement of your highlights and contours. The most common face shapes are:
- Round: Characterized by a wide forehead, full cheeks, and a rounded chin.
- Oval: A balanced proportion with a slightly wider forehead and a narrower chin.
- Square: Angular features with a broad forehead, strong jawline, and square chin.
- Heart: Wider at the forehead with a tapered, pointed chin.
- Oblong: Longer than it is wide, with a high forehead and narrow chin.
Take a moment to assess your face shape in the mirror, as this will be crucial in customizing your contouring routine.
The Basic Contouring Technique
Now that you’ve got the essential tools and know your face shape, let’s dive into the basic contouring technique. Follow these steps for a flawless, sculpted look:
- Apply Foundation: Start with a smooth, even base by applying your favorite foundation all over the face.
- Highlight the High Points: Using a highlighting powder or cream, apply product to the high points of your face, such as the center of the forehead, the bridge of the nose, the tops of the cheekbones, the cupid’s bow, and the chin.
- Contour the Hollows: With a cool toned contour powder or cream, apply product to the hollows of the cheeks, the temples, the sides of the nose, and the jawline.
- Blend, Blend, Blend: Use a fluffy, clean makeup brush or a damp beauty sponge to seamlessly blend the highlight and contour shades, making sure there are no harsh lines or edges.
- Set with Powder: Finish by lightly dusting a translucent powder over the highlighted and contoured areas to help set the makeup and create a long lasting, flawless complexion.
Remember, the key to natural looking contour is to start with a light hand and gradually build up the intensity. It’s always easier to add more product than it is to remove too much.
Advanced Contouring Techniques
Now that you’ve mastered the basic contouring technique, let’s explore some more advanced methods to take your look to the next level.
Nose Contouring
Contouring the nose can be a game changer for creating the illusion of a smaller, more defined nasal feature. Here’s how to do it:
- Apply a cool toned contour shade down the sides of the nose, blending it outward towards the cheeks.
- Highlight the center of the nose, the tip, and the bridge to create the appearance of a narrower, more refined nose shape.
- Blend the contour and highlight seamlessly for a natural, sculpted look.
Jawline and Chin Contouring
Accentuating the jawline and chin can help create a more chiseled, defined appearance. Follow these steps:
- Apply contour powder or cream along the jawline, blending it into the hollows of the cheeks.
- Contour the sides of the chin to create the illusion of a sharper, more prominent chin.
- Highlight the center of the chin to draw attention to this area.
Cheekbone Contouring
Enhancing your cheekbones is a surefire way to achieve a sculpted, editorial inspired look. Here’s how:
- Suck in your cheeks to find the natural hollows, then apply contour shade along these areas.
- Blend the contour upwards and outwards towards the temples for a lifted, defined effect.
- Highlight the tops of the cheekbones for added dimension and a luminous glow.
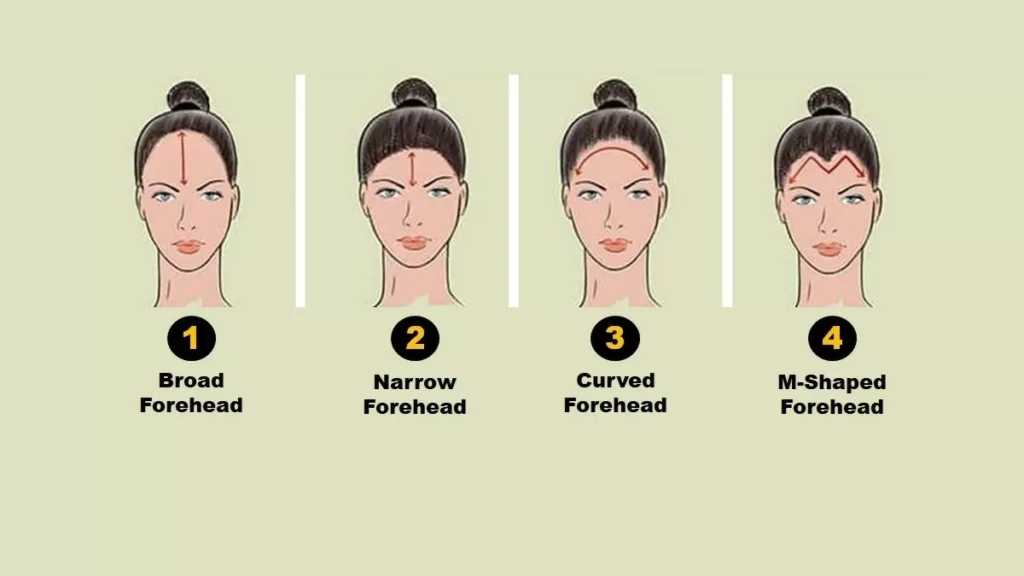
Forehead Shaping
Contouring the forehead can help balance out your facial features and create the illusion of a smaller, more proportionate brow area. Follow these steps:
- Apply contour powder or cream along the hairline and the temples, blending outwards.
- Highlight the center of the forehead to draw the eye upwards and create the appearance of a smaller, more narrow forehead.
Eye Area Definition
Contouring around the eyes can help enhance your gaze and make your eyes appear more lifted and awake. Try the following:
- Use a small, angled contour brush to apply a cool toned shade in the crease of the eyelid, blending outwards.
- Highlight the brow bone and the inner corners of the eyes to open up and brighten the eye area.
- Contour the sides of the nose, blending it up towards the inner corners of the eyes, to define and enhance the eye shape.
Remember, when it comes to advanced contouring techniques, start with a light hand and gradually build up the intensity. Blending is key to achieving a seamless, natural looking finish.
Choosing the Right Contouring Products
With so many contouring products on the market, it can be overwhelming to choose the right ones for your skin type and tone. Let’s break down the different formulas and discuss how to select the perfect contour and highlight shades.
Cream vs. Powder Formulas
Both cream and powder contour and highlight products have their own unique benefits:
Cream Formulas:
- Offer a more natural, skin like finish
- Blend seamlessly into the skin
- Work well for dry or mature skin types
- May require more maintenance throughout the day
Powder Formulas:
- Provide a more defined, sculpted look
- Last longer on the skin
- Ideal for oily or combination skin types
- Can sometimes appear more obvious on the skin if not blended well
Ultimately, the best formula for you will depend on your personal preferences and your skin type. Experiment with both to see which one you feel most comfortable using.
Finding the Right Undertones and Shades
When selecting contour and highlight shades, it’s important to consider your unique skin undertones. Opt for:
- Cool toned contour shades: Shades with gray or blue undertones work best for fair to medium skin tones, while warmer, more olive based contour shades are ideal for deeper complexions.
- Luminous highlight shades: Look for shimmery, light reflecting formulas that are one to two shades lighter than your skin tone. Avoid anything too stark or chalky.
To find your perfect match, swatch products on the perimeter of your face and blend them in to see how they harmonize with your skin.
It may take some trial and error, but the right shades will make all the difference in achieving a natural, flattering contoured look.
Contouring Hacks and Troubleshooting
No matter how skilled you become at contouring, there will always be a few challenges that you’ll need to overcome. Here are some genius tips and tricks to help you achieve flawless results every time:
Avoiding Harsh Lines
- Blend, blend, blend! Use a fluffy, clean makeup brush or a damp beauty sponge to seamlessly diffuse the edges of your contour and highlight.
- Apply contour and highlight in the shape of a “3” or a “E” on each side of the face, rather than just placing straight lines.
- Use a transition shade, like a warm bronzer, to help blend the contour into the surrounding skin.
Preventing a Muddy Appearance
- Be mindful of the undertones in your contour and highlight shades make sure they complement each other and your natural skin tone.
- Dust a translucent powder over the contoured areas to help set the makeup and prevent any unwanted mixing or muddiness.
- Avoid applying contour and highlight directly on top of each other, as this can create an unnatural, harsh line.
Making Contouring Last
- Use a long wearing, transfer resistant foundation as your base.
- Set your contour and highlight with a finely milled, translucent powder.
- Carry blotting papers or a mattifying powder with you for touch ups throughout the day.
- Spritz your face with a setting spray to help melt the makeup into the skin for a more natural, long lasting finish.
Correcting Mistakes
- If you’ve applied too much contour, use a damp beauty sponge or a clean brush to lightly buff away the excess product.
- For overly highlighted areas, dust a small amount of translucent powder over the top to tone down the shine.
- In a pinch, you can use a small amount of foundation or concealer to help neutralize and blend out any harsh lines or uneven application.
Remember, contouring is an art, and it takes practice to perfect. Don’t get discouraged if it doesn’t come out flawless the first few times with patience and the right techniques, you’ll be a contouring pro in no time.
Conclusion
Mastering the art of face contouring is a game changer when it comes to enhancing your natural features and achieving a sculpted, defined look. By understanding the fundamentals, exploring advanced techniques, and selecting the right products for your skin, you’ll be on your way to flawless, professional level contoured makeup looks.
Remember to always start with a light hand, blend thoroughly, and customize your routine to suit your unique face shape and skin tone. With a little practice and these expert tips, you’ll be contouring like a true pro in no time.
So, what are you waiting for? Grab your brushes, powders, and creams, and get ready to take your makeup game to the next level!
FAQs
What are the best contouring products for beginners? For beginners, we recommend starting with cream based contour and highlight products, as they tend to be more forgiving and easier to blend. Some great options include the Fenty Beauty Match Stix Matte Skinstick and the Charlotte Tilbury Hollywood Contour Wand.
How do I choose the right contour shade for my skin tone? When selecting a contour shade, you’ll want to choose a matte, cool toned product that is 1-2 shades darker than your natural skin tone. Avoid anything too warm or orange, as this can look unnatural. Swatch the product along the perimeter of your face to ensure a seamless blend.
How often should I contour my face? The frequency of contouring really depends on your personal preference and the occasion. For everyday wear, you may only need a light, subtle contour. But for more glam looks or special events, you can build up the intensity. The key is to start with a light hand and gradually add more product as needed.
What’s the best way to maintain my contoured look throughout the day? To help your contour and highlight last, be sure to set them with a translucent powder and finish with a setting spray. Carry blotting papers or a mattifying powder in your bag for mid day touch ups. Avoid excessive oil or sweat, as this can cause your makeup to break down prematurely.
Can I contour if I have dry or mature skin? Absolutely! Contouring can be adapted for all skin types, including dry and mature complexions. Opt for cream based formulas, which tend to be more hydrating and blend seamlessly into the skin. Be sure to exfoliate regularly and use a hydrating primer to create the best canvas for your contoured look.
