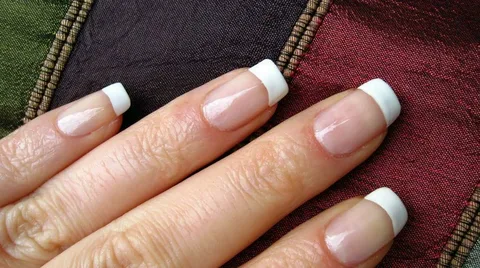
The French manicure is one of the most iconic and elegant nail designs. Known for its classic look, it’s simple, yet stylish, and works well for both casual and formal occasions.
Whether you’re heading to a wedding, a work event, or just want a polished look, the French manicure is a go to choice.
In this article, we’ll take you through everything you need to know to achieve the perfect French manicure, from prepping your nails to finishing touches.
What is a French Manicure?
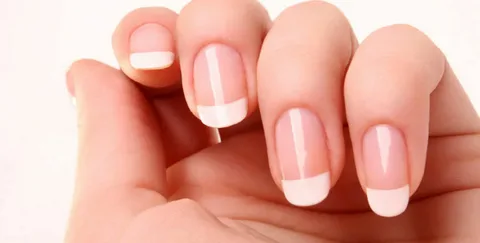
A French manicure traditionally consists of a nude or pale pink base with white tips, creating a clean, polished look. The look is minimalistic, yet sophisticated, and is suitable for almost any occasion.
It’s a design that enhances the natural beauty of your nails, making them look neat, elegant, and chic.
Essential Tools for the Perfect French Manicure
Before you begin, gather your tools. Having the right tools ensures the process is easier and your results are flawless.
- Base Coat: Protects your nails and helps the polish adhere better.
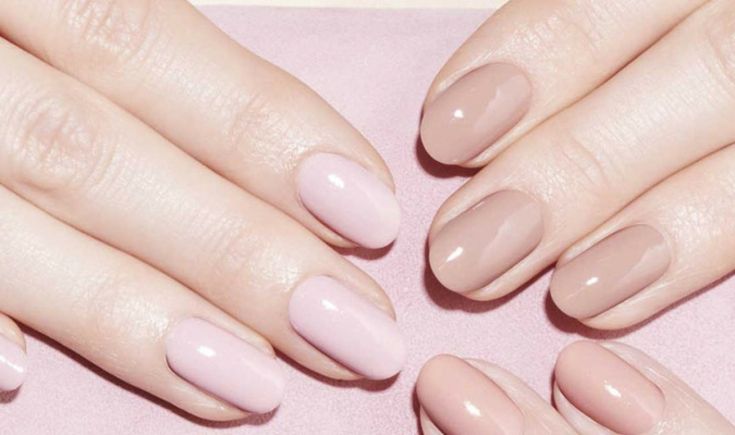
- Nude or Pink Polish: Choose a shade that matches your skin tone for the base.
- White Nail Polish: For the tips of the nails. Pick a formula that applies smoothly.
- Nail Art Tape or Stickers: Optional, for precise tip lines.
- Fine Tipped Brush: For touch ups and neatening edges.
- Top Coat: Seals the manicure, adding shine and durability.
- Cotton Swabs or a Clean Up Brush: To fix any mistakes.
Step by Step Guide to Achieve the Perfect French Manicure
Step 1: Nail Preparation
Nail prep is key to a perfect French manicure. Properly prepared nails ensure that your manicure lasts longer and your nails stay healthy.
- Remove any old polish using a gentle nail polish remover. Be sure to clean your nails completely.
- Trim and shape your nails. Use a nail file to shape your nails into a square, oval, or almond shape. Make sure your nails are even.
- Buff your nails gently to smooth the surface and remove any ridges.
- Apply a nail buffer around the edges to smooth out rough spots and create a clean canvas.
- Push back your cuticles with a cuticle pusher to get them out of the way and make your nails look longer.
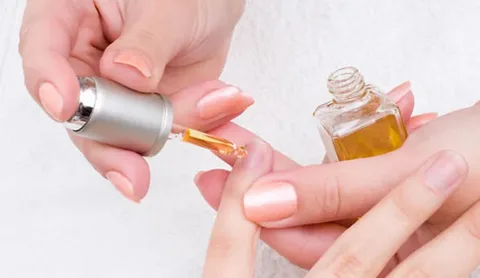
- Apply a nail moisturizer or cuticle oil to keep your nails hydrated.
Step 2: Apply the Base Coat
A base coat helps the polish stick to your nails and prevents staining. Here’s how to apply it:
- Choose a base coat suitable for your nails (you can pick a strengthening base coat or one that helps with nail growth).
- Apply a thin, even layer of base coat to each nail.
- Allow it to dry completely before moving on to the next step. This will ensure the base layer doesn’t get disrupted.
Step 3: Apply the Nude or Pink Base
The key to a beautiful French manicure is a natural looking base that complements the white tips. Here’s how to apply the nude or pink shade:
- Choose a nude or pink nail polish that complements your skin tone. If you have fair skin, a pale pink shade will look best, while medium or darker tones may want to go with beige or peachy hues.
- Apply the first thin coat of base polish. Be sure to coat each nail evenly, from base to tip.
- Let the first coat dry for about 1-2 minutes.
- Apply a second coat of nude or pink polish to ensure the base color is opaque and even.
Step 4: Create the White Tips
The signature feature of the French manicure is the white tips. Here’s where the real magic happens. You have several options for this step:
Using a Freehand Method:
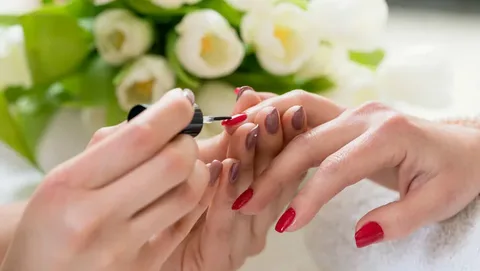
- Dip a fine tipped brush or a toothpick into your white nail polish.
- Carefully paint a thin white line along the tips of each nail. The line should be slightly curved to follow the natural shape of the nail tip.
- Steady your hand and take your time, as the white tips need to be neat and consistent.
Using Nail Art Tape or Stickers:
If you’re not confident with freehand painting, nail art tape or stickers are a great solution. Follow these steps:
- Place the tape or stickers along the natural tip of your nails, leaving the nail tip exposed.
- Paint the exposed area with white polish.
- Allow the white polish to dry completely before carefully removing the tape.
Tip: For a more dramatic look, you can create a thicker white tip or even add a slight curve for a more modern, edgy French manicure.
Step 5: Fix Mistakes and Clean Edges
It’s important to make sure that the white tips are neat. Here’s how to clean up the edges:
- Dip a small brush or cotton swab into a bit of nail polish remover.
- Gently clean around the edges of your nails, removing any excess polish from your skin.
- You can also use the brush to fix any uneven lines along the tips.
Step 6: Apply the Top Coat
The top coat is essential for sealing in your French manicure and giving it that beautiful shine. It also helps the design last longer by protecting your polish from chips.
- Choose a high shine top coat to give your French manicure a glossy finish.
- Apply a thin layer of top coat over the entire nail, from base to tip. Be sure to cover the white tips completely.
- Let the top coat dry completely. You can speed up the drying process by using a quick dry spray or dropper.
Step 7: Final Touches
Once your French manicure is completely dry, you’re done! But there are a few final touches to consider:
- If you prefer a matte finish, try using a matte top coat instead of a glossy one.
- For a modern twist, you can add glitter, gold foil, or tiny rhinestones to the tips for extra glam.
- Regularly apply cuticle oil to keep your nails hydrated and your French manicure looking fresh.
Tips for a Long Lasting French Manicure
To make sure your French manicure lasts as long as possible, here are some helpful tips:
- Avoid harsh chemicals: Wear gloves when cleaning or doing dishes to prevent your nails from becoming damaged.
- Touch up the tips: If the white tips start to chip or fade, use a fine brush to touch them up.
- Reapply top coat: Apply a new layer of top coat every 2-3 days to keep your nails looking fresh and shiny.
Common Mistakes to Avoid
Achieving the perfect French manicure can be tricky if you’re not careful. Avoid these common mistakes:
- Uneven white tips: The white tips should be as even and smooth as possible. If your hand is shaky, use nail tape for cleaner lines.
- Too thick of a white tip: Keep the white tips thin and natural looking to maintain the classic French manicure appearance.
- Not waiting for each layer to dry: Rushing through the process can lead to smudges and imperfections. Let each layer dry fully before moving on to the next.
Conclusion
The French manicure is a timeless, elegant look that never goes out of style. Whether you’re doing it yourself at home or getting it done professionally, achieving the perfect French manicure is all about patience, precision, and the right tools.
By following the steps outlined in this guide, you’ll be able to create flawless French tips that are polished and chic.
Now, with these techniques in hand, you can rock a beautiful French manicure at any time. Whether you’re dressing up for a formal event or just want to feel elegant, this classic nail art will never disappoint!
FAQs
- How long does a French manicure last?
A French manicure can last up to a week if you use a top coat and avoid contact with harsh chemicals. - Can I use a gel French manicure at home?
Yes, you can achieve a gel French manicure at home, but it requires a UV lamp to cure the gel polish. - What is the best color for the base of a French manicure?
The best base color is a nude or pale pink that matches your natural nail tone. - How do I fix uneven white tips?
You can use a fine brush or nail art tape to fix any mistakes and make the tips more even. - Can I add designs to my French manicure?
Absolutely! You can decorate your French manicure with rhinestones, glitter, or even small floral designs for a modern twist.
